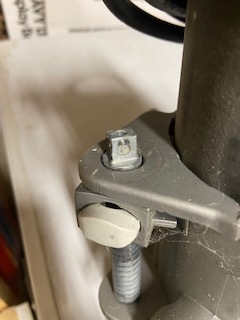
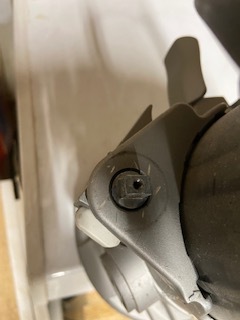
When placing the z axis motor on I noticed the metal piece from the depth gauge on the router will not fit. I read that this router is compatible with the maslow z axis set up but doesn’t seem to be true. Am I missing a step or have I misread the router info. Any feed back would be awesome finally to this stage of setting up after 6 months.
I started out with the same one. I just used a Dremel with a cutting wheel and cut down the ends of the piece that attaches to the knob so it would fit in the coupler for the z-motor. I am not at home so I can’t take any pics to show what I mean, but you can cut down the rectangular piece to fit in the coupler. I just made sure the 2 set screws were on flat parts of the rectangle.
I’ll try to grab some pics when I get home if this is in fact the same router.
On that note, though it worked okay for me, I will tell you you are better off with a router with variable speed. That Ryobi has a fixed rpm of 27000 (if I remember correctly) and I was burning up bits and some of the wood on projects that I was cutting. That is very fast in rpm. I have a Skil router now that usually keep down between 10000 and 13000 rpm and I get beautiful cuts and I’m not killing my bits.
Here is the router that I ended up with:
I understand if you are trying to do this on a budget, I was in the same boat. But I can’t stress enough that having that variable speed makes a huge difference. The z-control nob on it is on the left hand side, so I had to move that mount to a spot that didn’t have the pre marked holes, but the screws wen in just fine. The only think I don’t like about it is there are 3 locking points in the original base, so I have had to play around with it to find the position that allows me the most travel. I am going to get around that by making the Meticulous-Z upgrade. I have all the parts, I just need to get the pieces cut on my rig, and I had to modify the carriage bracket to accept the router mount. But I digress from your original question.
That Ryobi one can work, but you’ll need to do some serious calculations to get your feeds and speeds right. Let me know if you need those pics.
Here are the pics of the attachment part for the Ryobi z-axis. You can see on the one side where I was able to cut it down with my Dremel. If you don’t have one, then I am sure a hacksaw or a good file would work too. It is aluminum (I’m pretty sure) and shouldn’t be too hard to shave down. As I said in my last post, I don’t use it on my Maslow any longer due to the fixed RPM being so high.

